
Wednesday, 20 June 2012
Model Images


I chose to get my model 3d printed so that I could show the hexagonal pattern in detail. I felt the hexagon composition was an important part of the structure and to get it laser cut, I would have lost this detail, so for this reason I had my model 3d printed
The Dali Pavilion
The Site

The Development

The Form
Inspired by Salvador Dali, and in particular his artwork ‘The Persistence of Memory’, I had envisioned a structure that folded in on itself creating a melting effect, much like the clocks in his artwork. By creating a straight tower-like shape that folds over and snakes into a curve, the structure is given the appearance of a tower that has been stretched like rubber.
To compliment this unique shape, I have embedded a hexagonal pattern into the structure. Rather than having a solid shape with a few holes in it, this structure is made entirely of over 100 hollow hexagons which piece together in a very precise way to create the overall form. The advantage of doing this, apart from its aesthetic advantages, is that it allows people to see through the entire structure. People who come to the Crown St/ Cathedral St intersection will be able to look through the architecture and onto the domain and cityscape behind it. It also allows for those inside the structure to have an unobstructed 360 degree view around them. From the top level of the pavilion those inside the structure would be able to see onto the domain, the city, and over the rooftops of the houses onto Oxford St.


The Opportunity
The way the pavilion snakes around on itself creates a circular area which can be used for a small café or possibly a playground. No matter what is put in this area, the way the pavilion wraps around it, it creates a sense of enclosure and connectivity with the structure while still maintaining an open feel that draws the citizens towards The Domain.


Tuesday, 19 June 2012


Sunday, 17 June 2012
Final Grasshopper

My final Grasshopper file is based on a line that forms the path for a loft, which then has a shape morphed onto it to create the texture.
The path is made by using graph-mappers and the series nodes to create a curve that can be modified in the X, Y and Z direction. There is also a vertical line which ensures that there is a vertical part of the structure (which will act as the main functional part of the structure). By setting planes to act along this newly created line, I have created a series of circles that form the basic shape of the loft. This loft is then divided up and the surface texture is applied which breaks each of these loft-divisions up into individual hexagons.

Friday, 15 June 2012
Site Change
After visiting 'The Toaster' I have realised that the shape i am trying to achieve will not work well with the site. For this reason i have decided to change my site to the Crown St / Cathedral St Corner. Due to the shape and size of this site i feel that it will work much better with the design of my structure
Tuesday, 12 June 2012
Grasshopper Development
After a discussion with Jeremy on Thursday I was further able to refine my grasshopper algorithm, and give my self more creative control over the texture of the structure.


Additional test render, playing with different settings and camera views
Wednesday, 23 May 2012
Further Development
Developing the same concept of a melting structure, i took the advice from tutors and and the shape of the structure follow an interpolated curve which was made using the series node. By moving the curve on a graph-mapper, the curve of the line can be altered which in turn alters the shape of the structure. This not only develops much more interesting shapes, but also gives the user much more control over the final shape of the structure by only having to move a few sliders/graph mappers
 The above image shows the development from the previous submission. I have also added a hexagonal pattern to the entire structure to add another element to the overall appearance.

Thursday, 10 May 2012
Assignment 3 Progress
Having chosen Surface Architecture and Salvador Dali as my two inspirations, I have decided to make a pavilion-type structure that captures the abstract qualities of Dali's artworks. Drawing main inspiration from his famous artwork 'Persistence in Memory' i have tried to create a structure that has the effect of melting on itself (like the clocks in the artwork)
The final Tier 2 submission for Assignment 2 showed the development of this idea.

The final Tier 2 submission for Assignment 2 showed the development of this idea.

The general concept can be seen in the structure above, however this model lacks interactivity and is fairly rigid (in the sense that moving sliders in grasshopper doesn't provide interesting/different iterations)
Wednesday, 28 March 2012
Print Version Poster and Final Flowgraph

This version of the poster doesn't contain the text as that has been set to a roll over effect that can be seen in the interactive poster.

Test Iterations


These renders of a few select iterations show the materials that will be used for the final poster. I have chosen to use a solid yellow-orange colour to represent the honeycomb which was the inspiration for this assessment.
By using a v-ray light I have been able to create shadows on the geometries that make them even more interesting.
Sunday, 18 March 2012
Experimental Modelling
After doing a few various tutorials i felt that i was able to begin creating my own custom shapes. To start, i have made a basic sphere in grasshopper and applied a hexagonal pattern to it which was inspired by my chosen theme of honeycomb.
The hexagon has been all modelling in grasshopper, allowing you to control the individual vertices, distorting the hexagon and making a more complex pattern that will be projected onto the sphere


The hexagon has been all modelling in grasshopper, allowing you to control the individual vertices, distorting the hexagon and making a more complex pattern that will be projected onto the sphere


Tuesday, 13 March 2012
Chosen Theme
The theme I have chosen to explore further is 'Honeycomb'. I have chosen this theme due to the aesthetic appeal of the honeycomb structure and also because of how it is created. When researching honeycomb and bees, i came across a number called 'the golden ratio' which I also find very interesting and intend to use it as part of my final Grasshopper design.
Sources:
http://www.beesource.com/point-of-view/ed-dee-lusby/historical-data-on-the-influence-of-cell-size/the-building-of-honey-comb/
This source gives a detailed insight into the natural construction of honeycomb aswell as the physical properties of the honeycomb structure including its strength and weaknesses. The report goes into finer details discussing the difference between a vertical and horizontal structure and the angles of the individual hexagons.
http://www.health-benefits-of-honey.com/beehoneycomb.html
This website offers information on the history of honey aswell as what honeycomb is actually made up from.
http://www.lesjoforsab.com/news/news_detail.asp?nyhetsid=190&sprakid=2
This small article shows how naturally made shapes are being mimicked in industry to improve the properties of certain items.

Further Tutorials
Surface Morphing
I found this tutorial particularly useful as it shows how you can apply a shape to a surface, creating a new surface texture in the process. By changing the subdivides of the curved facade I can alter the size and shape of each pattern. I feel this tutorial will prove to be useful down the track


I found this tutorial particularly useful as it shows how you can apply a shape to a surface, creating a new surface texture in the process. By changing the subdivides of the curved facade I can alter the size and shape of each pattern. I feel this tutorial will prove to be useful down the track


Tuesday, 6 March 2012
Tutorials
Solid Path


This tutorial showed me how to make a curved path with the ability to change the width and thickness of it using sliders. The most useful part of this tutorial (I thought) was the last few nodes which show how to join the two offset faces using lofts


Sunday, 4 March 2012
Different Themes
Cracked Dry Mud

I find the image of cracked dried mud very interesting as it displays a series of disjointed irregular shapes that are able to all join together to create one form. Somehow the hundred off different random cracks are all able to come together and create a whole and unique texture.
Boulder Brain Coral
_entire_colony.jpg)
I find this system interesting due to the bright colours and interesting curves and squiggles. The seemly randomness of the ridges and how they never cross paths or collide and the gap between these ridges provide a very interesting and unique geometry.
Whirlpool

I find the idea of whirlpools interesting; how they form and how they look. Outside of the whirlpool the water is calm and as it gets closer to the epicentre it forms a stronger and tighter spiral. From looking at the image you can see the wide and weak spiralling lines and as it gets closer to the centre those lines are much tighter creating a basic, yet interesting shape.
Turkey Feathers
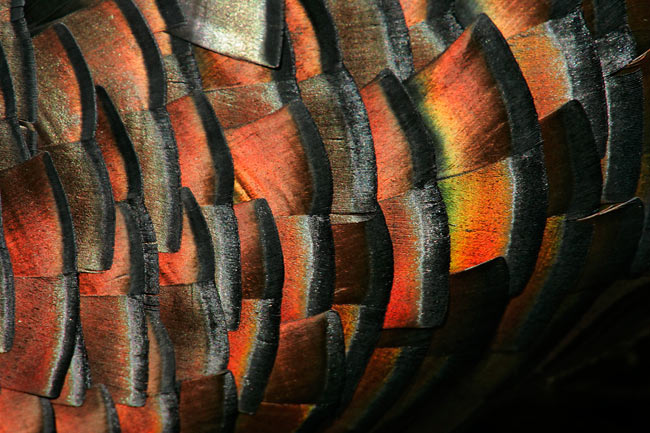
I find this texture interesting due to the overlapping nature of the feathers. Unlike typical bird feathers which are generally more pointy, the turkey feathers are much more square creating an interesting texture.

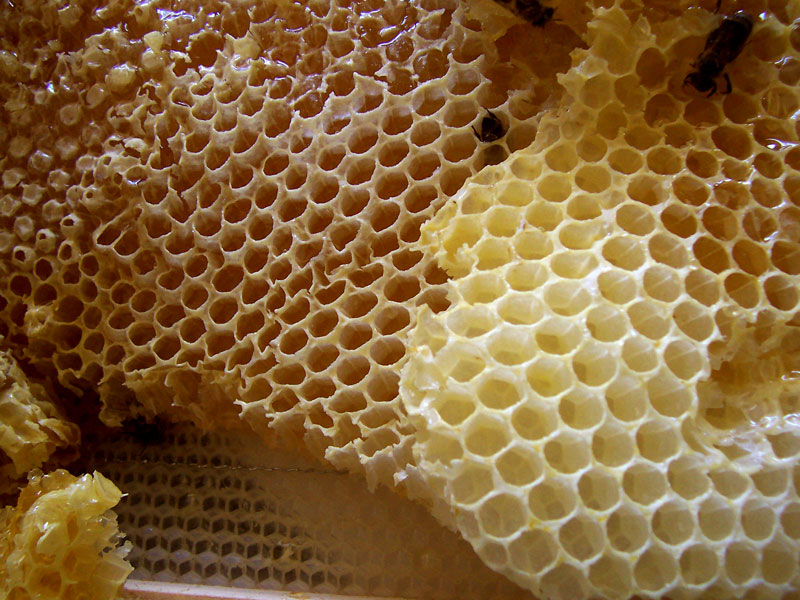
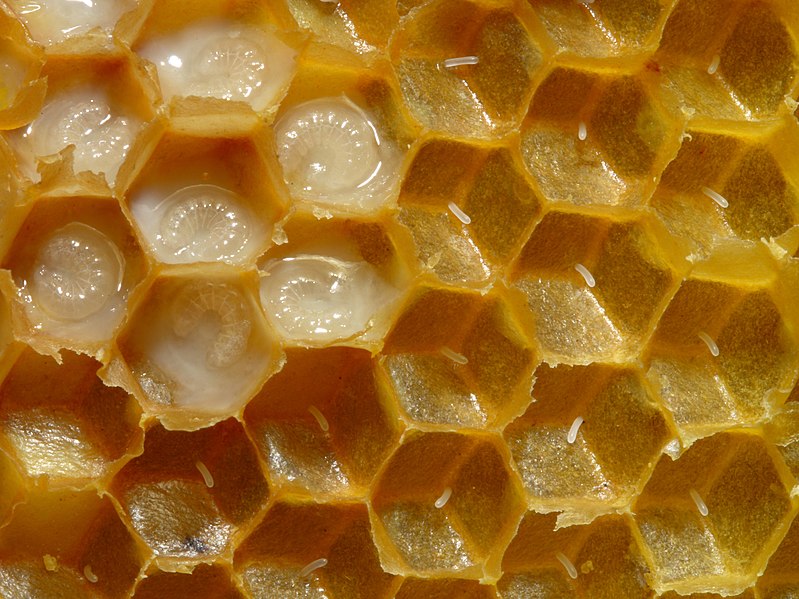
Honeycomb

I find the organised structure of honeycomb very interesting in the way that it is formed. Each hexagonal part of the honeycomb structure is the exact same size and in perfect proportion. This repeated pattern, even though it is quite simple, is very effective.
Subscribe to:
Comments (Atom)